Getting Started
How to
Brushes
- Nature Brushes
- Warping Brushes
- Background Copy Brush
- Bend Brush
- Drift Brush
- Radial Wave Brush
- Rotation Brush
- Turn and Fold Brushes
- Wave Brush
- Zoom Brush
- Glitter Brushes
Static Animations
How to Make Animations
DP Animation Maker Beginner’s Guide - Animating Still Images
This article will give you an overview of basic program functionality and animation techniques to help you to easily get started with DP Animation Maker.
Step 1 - Setting Background
DP Animation Maker is 2D software that operates only with images. The first image you need to start with is the background picture for your future scene. This picture will be the base for all of your additional animations so it needs to be large enough. We would recommend using HD and Full HD photos and images where possible.
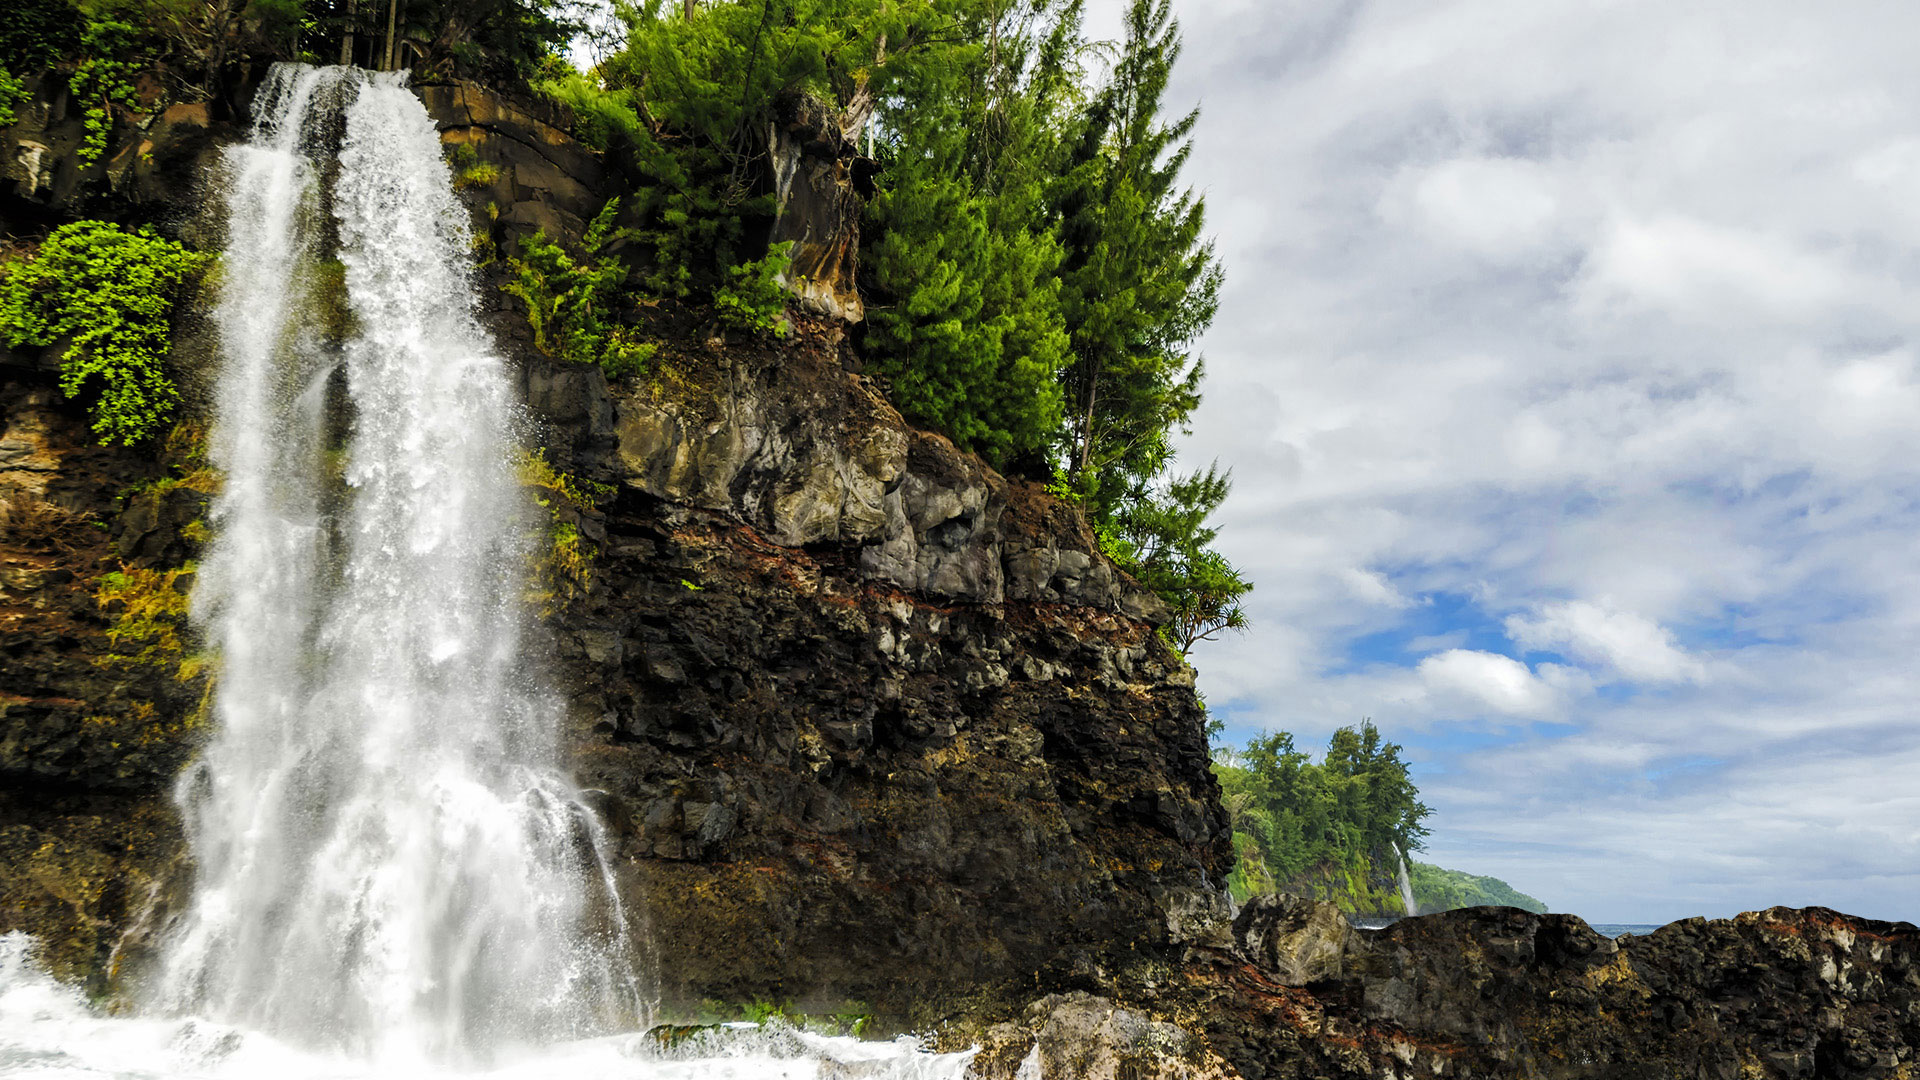
For example, let’s take this 1920x1080 nature photo.
Click to enlarge
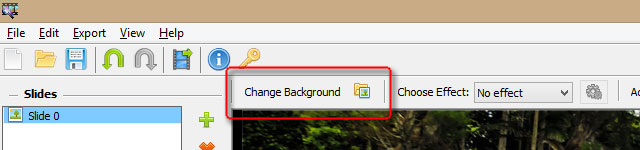
After you choose the background for your scene, use the "Change background..." button at the top of the preview area to load your image into the scene.
Step 2 - Adding Animations
There are two types of animation tools in DP Animation Maker. The first is ready-to-use objects and effects like snow, fish, lighting, and so on. The second type is animated brushes that you need to apply to certain areas of your background to get desired results.
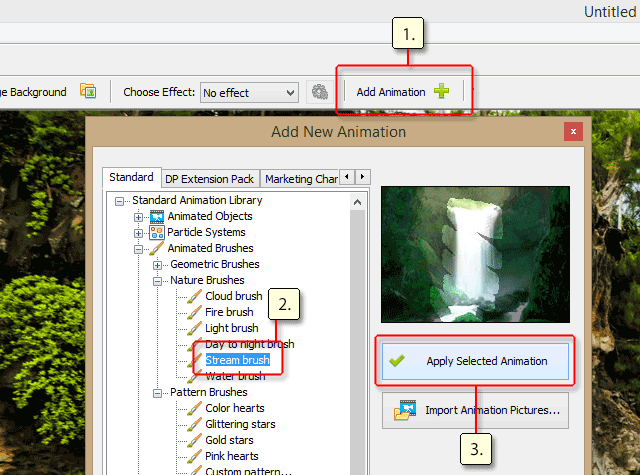
Let’s start with the animated brushes. The first thing, I would like to bring back to life on this photo, is the water. Click the "Add Animation" button at the top of the preview area and find the "Stream brush" in the library. After you select the "Stream brush", click the "Apply Selected Animation" button.
Now the "Stream brush" animation layer should appear in the list of scene animations on the right and the cursor in the preview area should turn into the cross with the brush stamp.
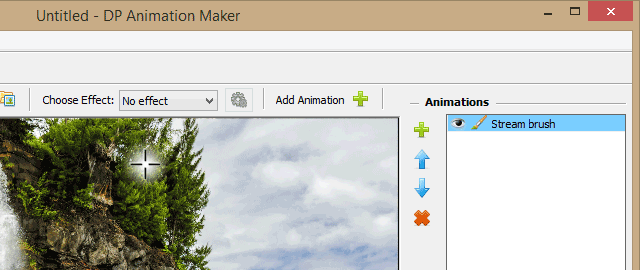
Use this brush cursor to paint over the part of the background with water, and see how this still image becomes animated.
There are plenty of options on the right that allow you to change the appearance and behavior of the effect. You can use these options to set the effect direction, speed, size, and color to fit any of your particular projects. However, in this example, we can leave them untouched as the default values perfectly suit our image.
Let’s proceed with ready-to-use animations. Use the "Add New Animation" dialog again to find and add into the scene the "Leaf fall 4" and "Rays of light 1" animated objects.

The default settings of these two animations work well for our scene too. However, if you want, you can use them to change the look of effects in the wide ranges.
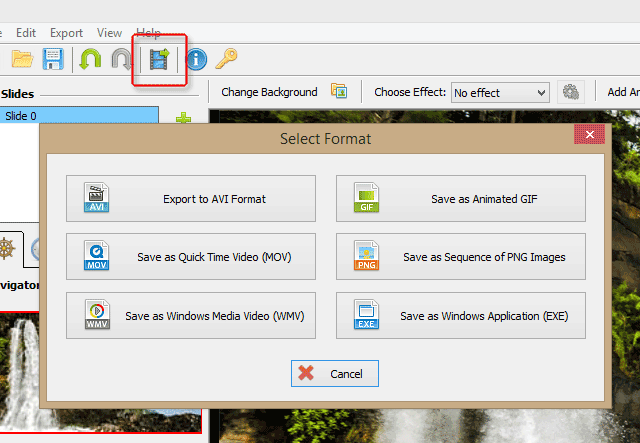
Step 3 - Exporting the Result
Now it is time to save the result. Click the Export button in the program toolbar and select one of 6 export formats.
The Final Result
Here is what we got in the result.