Getting Started
How to
Brushes
- Nature Brushes
- Warping Brushes
- Background Copy Brush
- Bend Brush
- Drift Brush
- Radial Wave Brush
- Rotation Brush
- Turn and Fold Brushes
- Wave Brush
- Zoom Brush
- Glitter Brushes
Static Animations
Day to Night Brush
Overview
This brush adds day to night transitions to the picture. Basically, the brush adds an additional layer to the picture, which simulates how surroundings darken down and then light up again.
How to use
1. Select Day to Night Brush from the Add New Animation dialog. The brush is located under the “Animated Brushes” section in the “Nature Brushes” subsection.
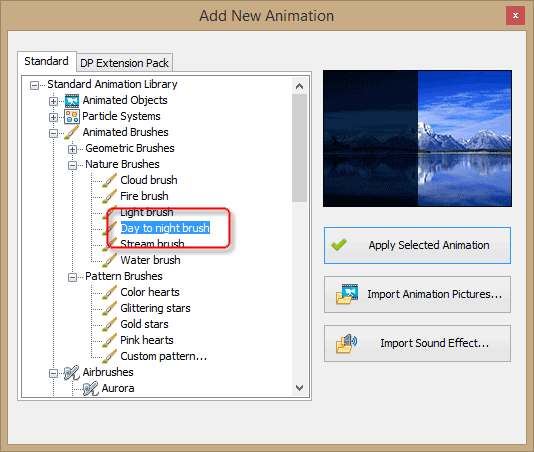
2. Click “Apply Selected Animation”. This adds Day to Night Brush to the list of Animations on the right.
3. As soon as you add the animation to the slide, the effect mask is automatically applied to the entire picture. To exclude some parts of the scene from the animation, switch to the Eraser tool and mark areas that should not be affected by the day to night transition. For instance, light sources, fire, some luminescent elements of the scene, and so on.
Also, note that the Animation Timings panel automatically goes to the Manual mode, so you could configure exactly how the day-night change should go. You can read more about adjusting animation timings here.
Effect Properties
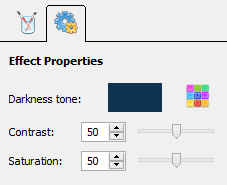
There are three properties of Day to Night Brush:
- Darkness tone. This parameter defines the tone of the picture during the “night” period. The entire picture, minus the erased areas (see above), is colored to this tone. Use dark blue or dark gray colors for typical night scenes. However, you can end up with some fantastic effects if you experiment with other colors.
- Contrast – defines the contrast of the night scene. Pale autumn nights feature less contrast, while summer nights (or some Sci-Fi landscapes during alien sun eclipse) probably should have more contrast.
- Saturation – determines the colorfulness of the day-night effect.