Getting Started
How to
Brushes
- Nature Brushes
- Warping Brushes
- Background Copy Brush
- Bend Brush
- Drift Brush
- Radial Wave Brush
- Rotation Brush
- Turn and Fold Brushes
- Wave Brush
- Zoom Brush
- Glitter Brushes
Static Animations
Cloud Brush
Description
Cloud Brush allows you to add cool-looking animated 3D clouds to the scene. Thanks to a large number of settings and preferences, you can add virtually any kind of clouds from ones that solidly flow across the sky to ones you can see during a gloomy, rainy day. Also, in many cases this brush can be used to animate other types of cloud effects such as fog, steam, etc. Here is how you can do this.
How to use
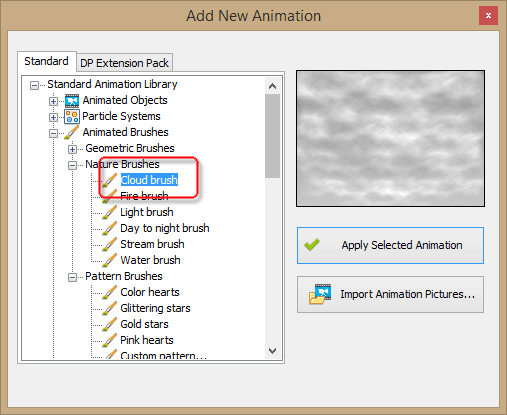
1. Select Cloud Brush from the Add New Animation dialog. The brush is located under the “Animated Brushes” section in the “Nature Brushes” subsection.
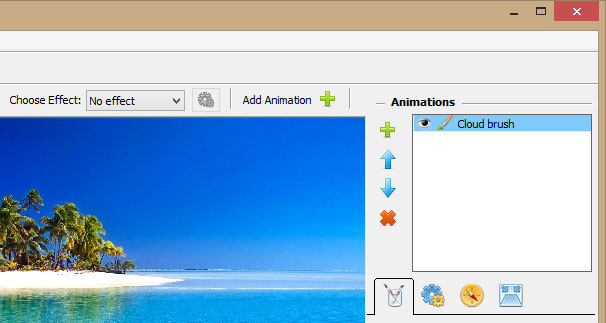
2. Click “Apply Selected Animation”. This adds Cloud Brush to the list of Animations as shown below.
3. Now you can paint with Cloud Brush just like a normal brush. Cover all parts of the image that you want to be covered with clouds. Similar to any other brush in DP Animations, you don’t need to be very precise while doing that.
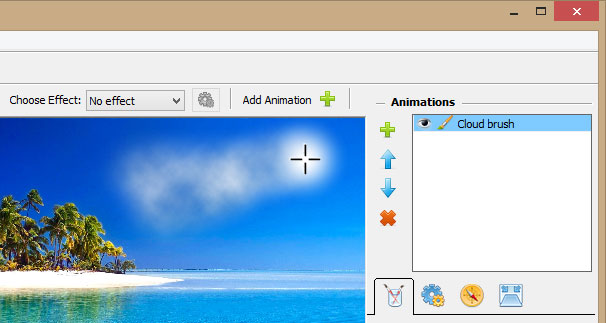
You can achieve very different results depending on which settings are selected for he brush:
Brush Properties
Cloud Brush properties are split onto three tabs: Basic properties, Motion, and Perspective. Let’s go through each one.
Basic Cloud Properties
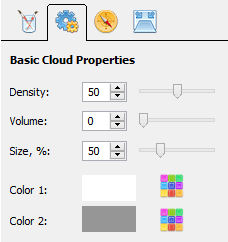
- Density – determines how dense the cloud should be. Technically, this parameter is similar to Opacity.
- Volume – this parameter defines how clouds are distributed. For cloudy skies or dense fog, set lower values. For light morning haze, set higher values.
- Size – adjusts the size of the cloud texture. The rule of thumb for the size property is: for large or close objects use a bigger size; for small or distant objects use a smaller size. However, don’t hesitate to experiment.
- Color – these are the two colors of the clouds. Adjust the color depending on the scene and the story the slide should tell. Storm clouds are usually dark grey or dark blue; cloudlets are more about white and light grey; magic potions should emit green or blue hues with white as a second color.
Motion Properties

This tab allows you to adjust how the cloud should move.
- Speed – sets the speed of cloud animation. While clouds usually do not race across the sky, you still may want to adjust the speed up or down. Also, smoldering coal emits much lighter and slower smoke fumes than those of intensively burning fire flames.
- Direction – choose where the clouds should move. For smoke, pick near-vertical directions.
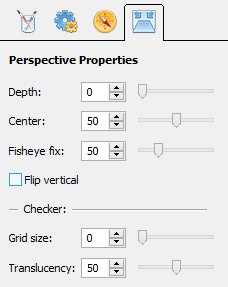
Perspective Properties
Here you can make the cloud effect look more natural if applied to the 3D perspective scene. Applying the 2D cloud texture to the picture that has significant perspective distortion results in a weird and unnatural effect:
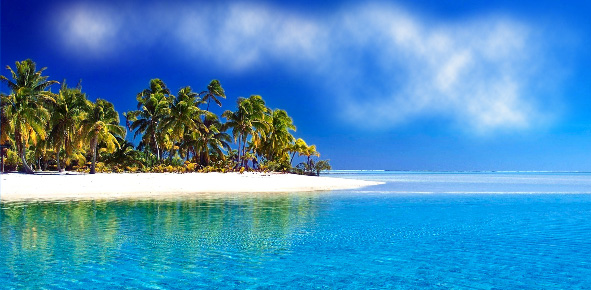
Animated cloud with Depth parameter = 0
The perspective properties allow you to correct this by adding perspective to the cloud as well:

Animated cloud with Depth parameter = 90
In fact, it is the perspective setting that adds a large portion of believability to the image of clouds in Cloud Brush, so don’t hesitate to play around with it to get a stunning cloudy sky effect.
Here are the options that control this parameter:
- Depth – select the depth of field that reflects the perspective of the given picture. Note that the grid represents the depth visually.
- Center – shift the perspective left or right.
- Fisheye fix – if the scene has some Fisheye distortion, use this parameter to apply the same to your Cloud Brush.
- Flip vertical – flips the perspective vertical. Useful when you need to add perspective to fog or mist.
- Checker – these two options control the grid, namely the Size of the grid and the Transparency of the grid. The grid does not become a part of animation, so this is for your convenience only.