Getting Started
How to
Brushes
- Nature Brushes
- Warping Brushes
- Background Copy Brush
- Bend Brush
- Drift Brush
- Radial Wave Brush
- Rotation Brush
- Turn and Fold Brushes
- Wave Brush
- Zoom Brush
- Glitter Brushes
Static Animations
Rotation Brush
Description
Rotation Brush is an extremely simple but indispensible brush to make objects rotate clockwise or anti-clockwise. What can you do with it? A lot. Animate wheels, gears, snowflakes, balls, falling leaves, space stations and planets. You can make the sun go up or down in the sky, or make the clock hands turn.
How to use Wave Brush
1. Select the Rotation Brush from the Add New Animation dialog. The brush is located under the “Animated Brushes” section in the “Warping Brushes” subsection.
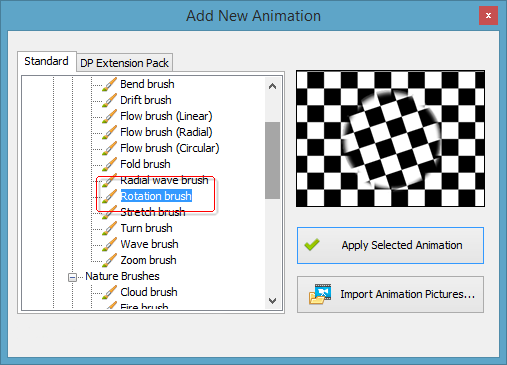
2. Click “Apply Selected Animation”. This adds Rotation Brush to the list of Animations on the right.
3. Paint with Rotation Brush just like you do in any other graphic editor. The painted area will rotate according to the specified parameters (see below). Adjust the center of rotation if necessary.
Brush Properties
Rotation Brush is very simple, so there does not need to be many options.
Effect Properties
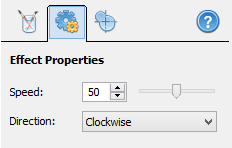
Speed – the speed of the animation. Some objects rotate fast – balls, car wheels and so on, while others require lower values – planets, snowflakes etc.
Direction – choose between clockwise and counterclockwise directions.
Effect Geometry
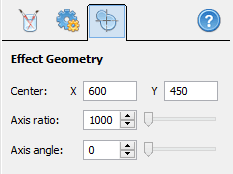
Axis ratio and Axis angle are parameters that allow you to change the shape of rotation. By default, the shape is circular, however in many cases circular rotation simply does not work. Take a look at this example:
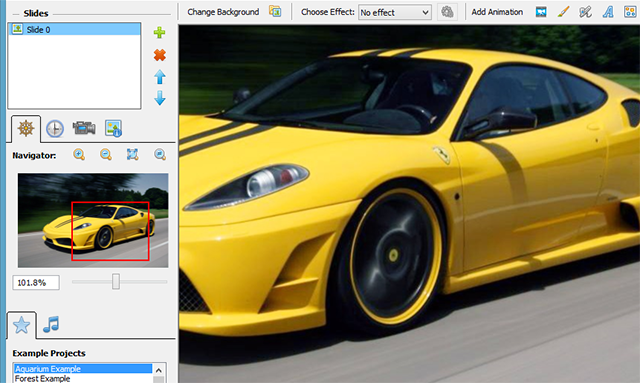
Here, due to perspective distortions, the wheels of the car do not look as circles, they are ellipses. With these two options you can adjust the rotation trajectory and make it an ellipse, like this:
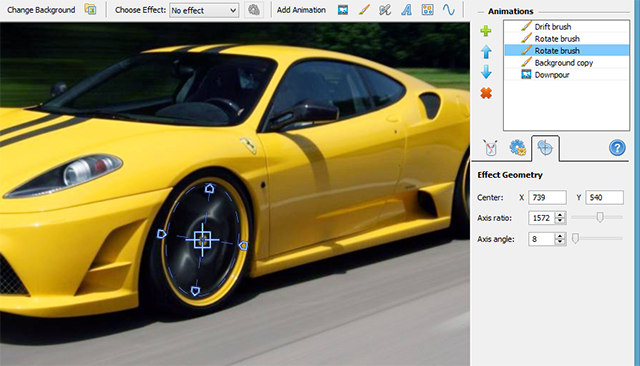
Here, the Axis ratio determines the ratio of two ellipse axes, and the Axis angle sets how they are oriented.